
LED with a Button - Writing the code#
As before, open your editor and write up the code below.
If your code is working as intended, you should be able to press the button and the LED will turn on. Once you release the button it should turn off.
import board
import digitalio
import time

led = digitalio.DigitalInOut(board.GP0)
led.direction = digitalio.Direction.OUTPUT
button = digitalio.DigitalInOut(board.GP1)
button.direction = digitalio.Direction.INPUT

while True:
    if button.value == True:
        led.value = True
    else:
        led.value = False
We follow the same structure:
Import modules
Create variables for inputs/outputs
Create a loop
As seen before, we must assign the LED as a digital output coming from its relevant pin.
We now also have to assign the button in a similar way, with the only difference being the use of digitalio.Direction.INPUT instead of .OUTPUT.
In the same way as for the LED, button.value is an object that can tell us about the digital state of the button. The difference is that since button is an input, the Pico can only measure/check button.value and can’t change it.
int led = 13    //set the pin number
int button = 3 //set the button pin number
// the setup function runs once when you press reset or power the board
void setup() {
    pinMODE(led, OUTPUT);
    pinMODE(button, INPUT); //button is an input

}

// the loop function runs over and over again forever
void loop() {
           int state - digitalRead(button); //read the state of the button (ON/OFF)
           if (state == HIGH){
                digitalWrite(led,HIGH);
           }
           else{
                digitalWrite(led,LOW);
           }
}
We follow the same structure:
Create variables for inputs/outputs
Set variables as inputs/outputs in the set up function
Run code in the loop
As seen before, we must assign the LED as a digital output coming from its relevant pin.
We now also have to assign the button in a similar way, with the only difference being the use of INPUT instead of OUTPUT in the pinMODE call.
In the same way as for the LED, digitalRead(button) is a function that can tell us about the digital state of the button.
If/else statements#
In order to allow the input coming from our button to interact with the output coming from our LED, we can use if/else statements, a type of conditional. These are fundamental in many programs and allow us to enact different responses if a condition is met vs not.
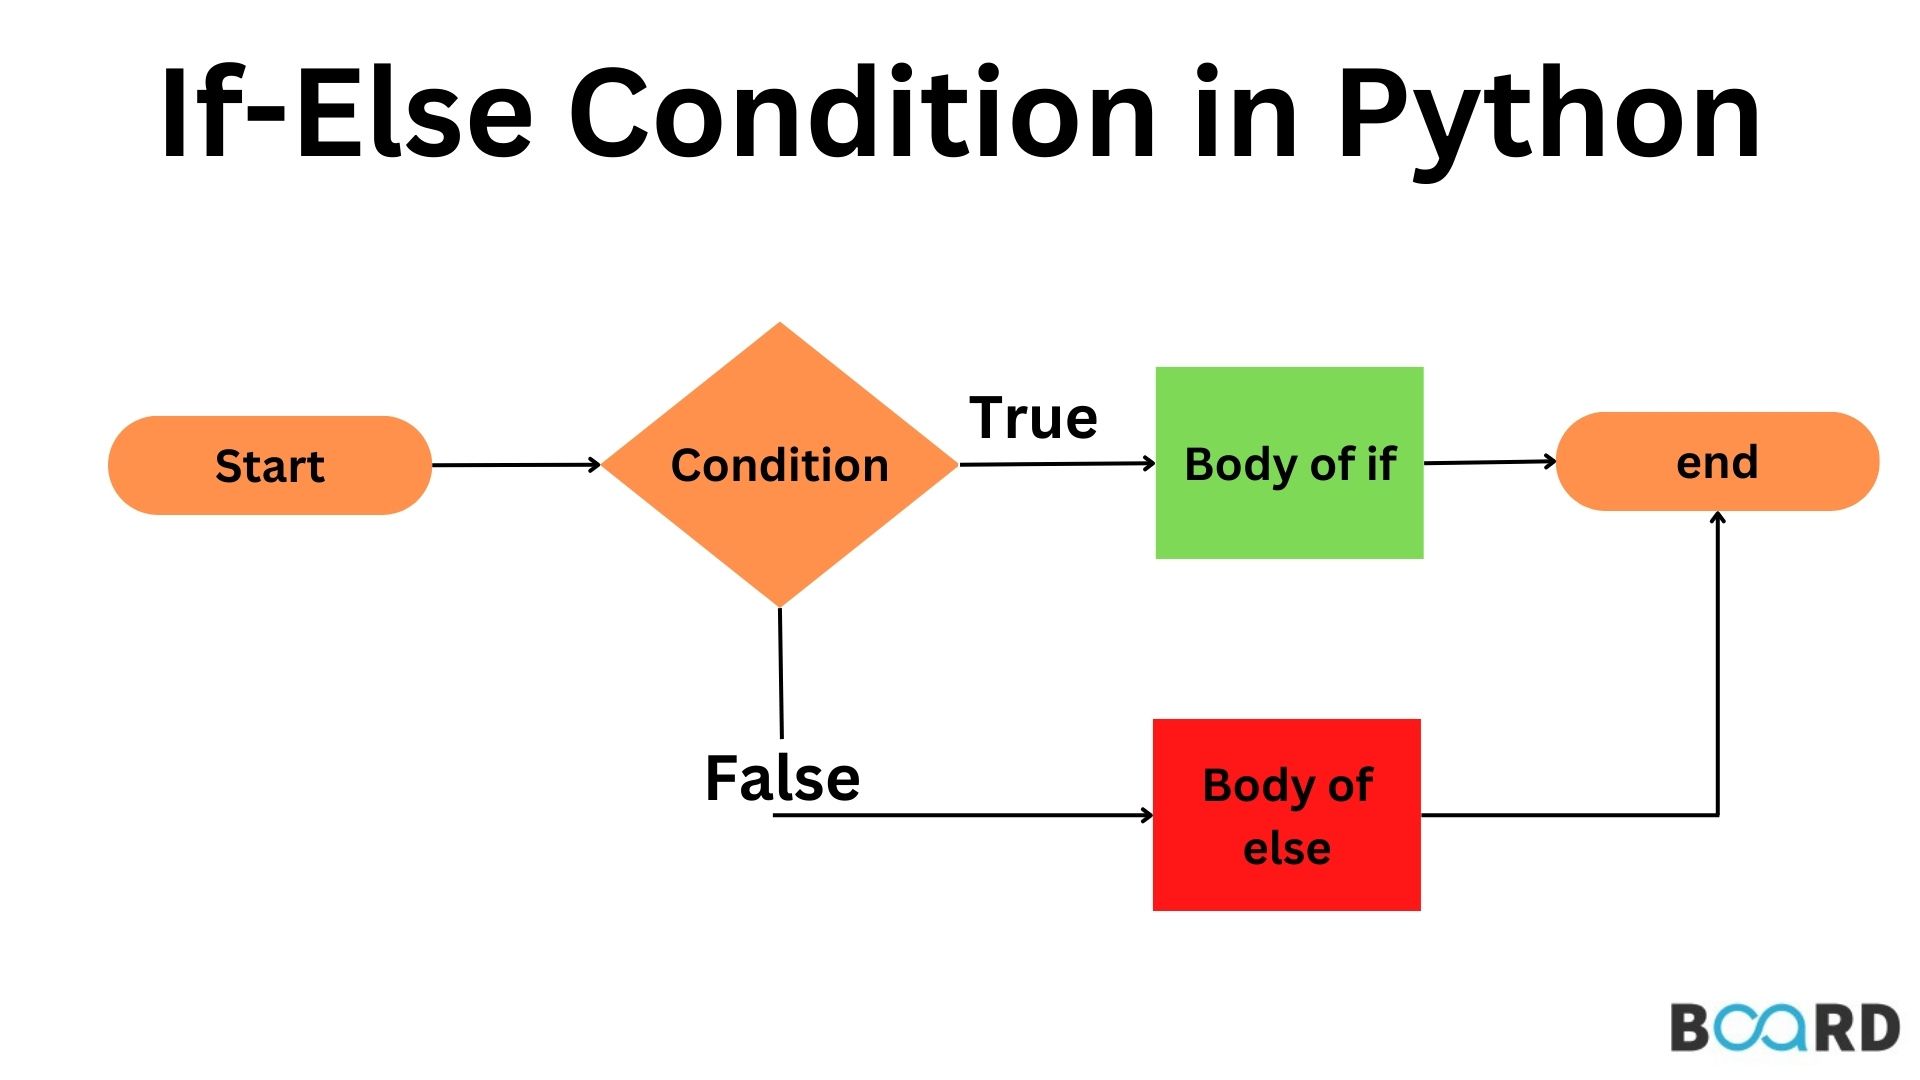
Fig. 9.2 Logical structure of if/else conditionals#
You can see that your code follows the same structure:
Condition
: button.value == True - Is the button currently being pressed?
Body of if
: led.value = True - Turn on the LED.
Body of else
: led.value = False - Turn off the LED.
We never need to include a condition with else: since it is logically taken to be anything not covered by the if condition. In our example - we are effectively saying else button.value == False: however this is already logically implied.
It is important to recognise that these conditions are not only checked once or when a change occurs. Since our if/else statements are in the while True: loop, your Pico is constantly looping through the decision tree seen above. We don’t always need to include the else statement - but here it is needed to ensure the the LED will switch off again once the once the button is not pressed.
Note on comparison operators
Conditions almost always make use of one of several inequalities.
Operator |
Symbol |
|---|---|
Equality |
|
Inequality |
|
Greater than |
|
Greater than or equal to |
|
Less than |
|
Less than or equal to |
|
Watch out
It is important to understand that = and == do quite different things and are not interchangeable.
=is used to set the value of variables or objects.{code-block} led.value = True # Sets the LED value to True (Turning it on)On the other hand
==is the equality operator and is used to check whether the value of a variable or object is equal to a given value. It will not change the variable you are checking.{code-block} if led.value == True: # Checks if the LED value is True (Is it on?) ... ...It is very easy to mix these up!
Condition
: digitalRead(button) == True - Is the button currently being pressed?
Body of if
: digitalWrite(led,HIGH) - Turn on the LED.
Body of else
: digitalWrite(led,LOW) - Turn off the LED.
We never need to include a condition with the else (i.e and else if) since it is logically taken to be anything not covered by the if condition. In our example - we are effectively saying else if (state == LOW) then however this is already logically implied.
It is important to recognise that these conditions are not only checked once or when a change occurs. Since our if/else statements are in the loop function, your Arduino is constantly looping through the decision tree seen above. We don’t always need to include the else statement - but here it is needed to ensure the the LED will switch off again once the once the button is not pressed.
Note on comparison operators
Conditions almost always make use of one of several inequalities.
Operator |
Symbol |
|---|---|
Equality |
|
Inequality |
|
Greater than |
|
Greater than or equal to |
|
Less than |
|
Less than or equal to |
|