
3. Setting up a Pico#
The Pico is a low cost, versatile microcontroller board that is can interact with a wide variety electronic devices like LEDs, sensors and motors.
The Pico website has excellent information on getting started with Picos with extensive documentation.
Here we will give our (probably idosyncratic) way to set up and use a Pico as an Inator.
Will assume that (at least initially) you will code in CircuitPython.
Pico Hardware#
There is plenty packed onto this compact board, but the two most important components on the board are the microcontroller in the centre and the 40 pins around the border:
The microcontroller is the square black chip in the centre of the board - (on the Pico it is a RP2040). This is effectively the brain of the board as it handles all computation and holds the memory.
The pins are used to electrically connect any external components to the Pico. All communication between the Pico and other devices is done via electrical signals that pass in or out through these pins.
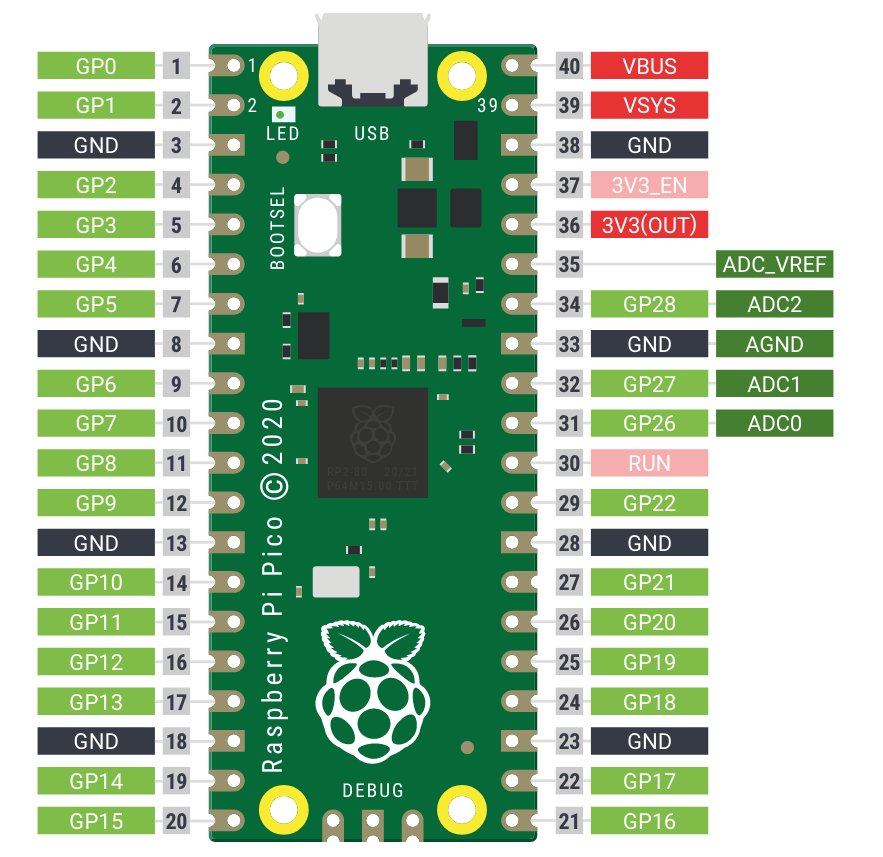
Above is a diagram of the Raspberry Pi Pico with each of the pins labelled with a description of their function. We can see 3 main groups of pins straight away.
Green = GP (General Purpose) pins
Black = Ground pins
Red = Power pins
Inputs vs Outputs
There are two fundamental types of electronic devices that we will use - Inputs and Outputs.
Inputs deliver some form of data to the Pico. Examples include sensors, microphones and even buttons.
Outputs receive data from the Pico and actuate some response. Examples include motors, speakers or LEDs.
General Purpose (GP) refers to the fact that these pins can be used with both inputs and outputs.
The purpose of each hardware element will become more clear with the examples given by the tutorials. For more technical specifications, check this website.
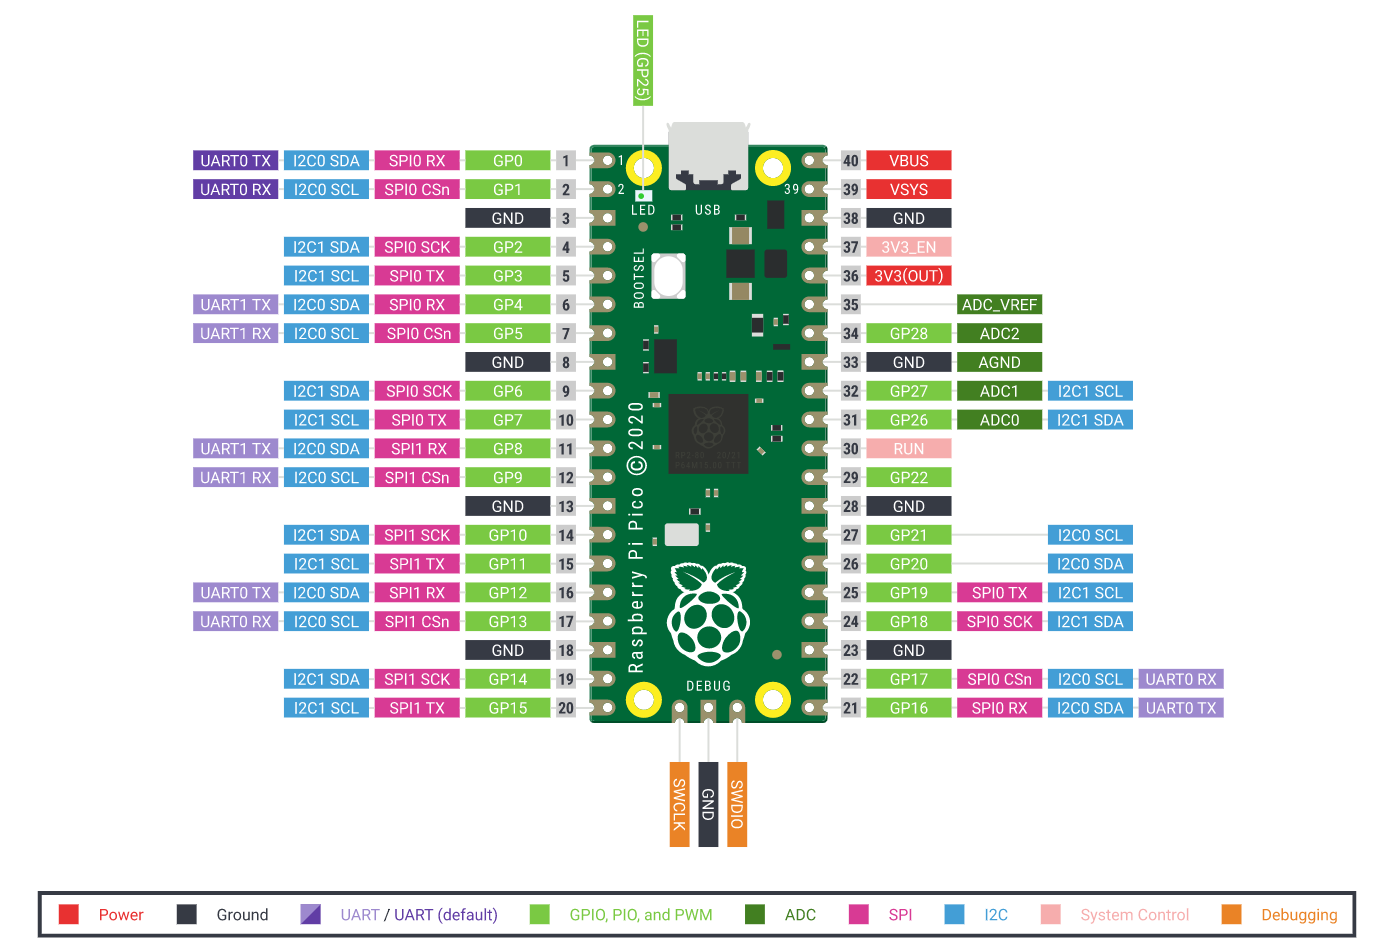
This extended pin-out diagram shows which pins that can be used for each of the UART, SPI and I2C protocols. For more detail see the section on sensors
CircuitPython#
CircuitPython is the language that allows us to communicate our instructions in a logical form that the Pico’s microcontroller can understand. It is a programming language based on the ubiquitous Python language. It uses the same syntax and has many of the same features as Python but is optimised for use with microcontrollers and sensing systems.
There are loads of guides and learning resources to help with using CircuitPython. Here are some useful links to start off with:
CircuitPython vs MicroPython
As well as CircuitPython, MicroPython is another popular program used to operate microcontrollers like the Pico. The two languages are very similar since CircuitPython is actually derived from MicroPython.
We use CircuitPython in this course since many find it slightly more accessible and comes with plenty of great learning resources. If you already have experience with MicroPython and want to keep using that, that is totally fine.
For more on the differences, you can check this page.