
Connection to HiveMQ#
the first step is to set up a free HiveMQ cloud server instructions are here
Once registered and a cloud is set up you can begin to send information from a device.
Example code for using a pico is here
In the settings.toml file you need to provide values for
MQTT_PORT = ___              # Fill in the port you are connecting over
MQTT_USERNAME = ""          # User name for connecting to MQTT Broker
MQTT_KEY = ""               # Password to connect to MQTT Broker
BROKER = ""                 # URL to connect to MQTT Broker
The MQTT_PORT and BROKER can be found on the status page for your HiveMQ instances

the MQTT_PORT is the port the BROKER is the TLS MQTT URL
To get the MQTT_USERNAME and MQTT_KEY you need to register a connection
Go to the Access Management tab of the status page for HiveMQ

and click on the Add Credientials button
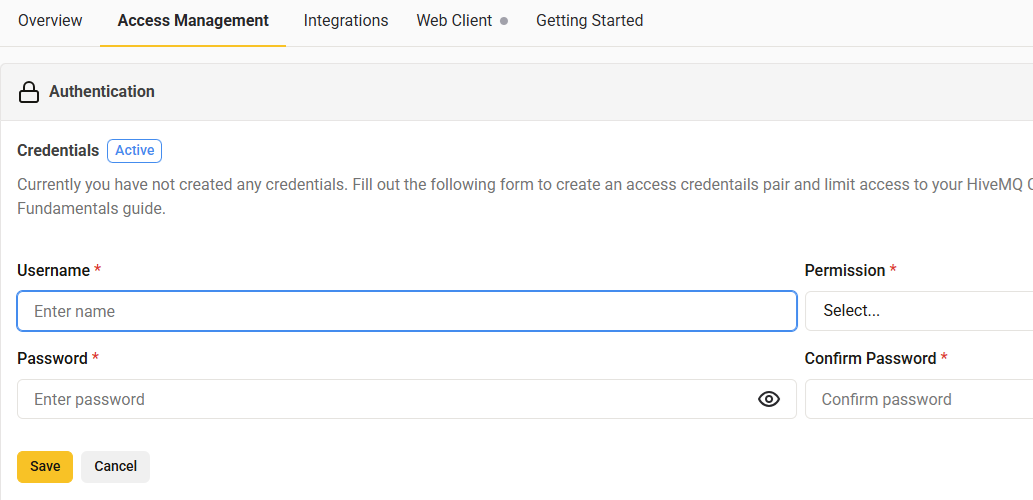
Enter a username (this will be the MQTT_USERNAME) and password (this will be hte MQTT_KEY) and set permissions. The permissions can be subscribe only, publish only or both. The choice depends on what you are connecting, but in general a sensor will require publish rights so it can send messages.
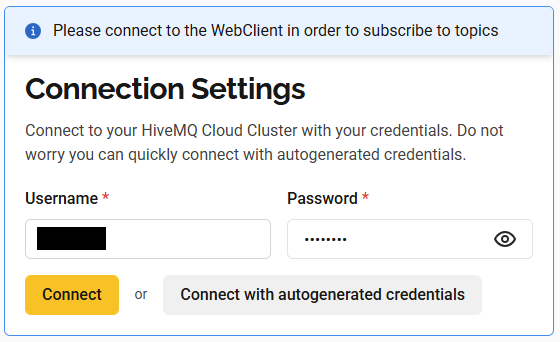
Once this is setup and a pico connected you can test if data is being transmitted.
Go to the Web Client Tab and connect the webclient by either creating your own username and password or by using an autogenerated one
Then go to the Topic subscription box make sure a # is in the box and click subscribe
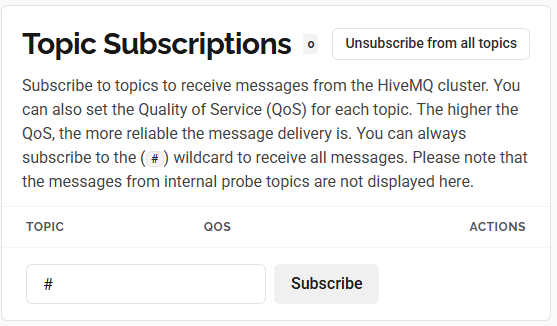
this will subscribe the web client to all incoming messages